Create with PrimeArt
Redesign any room from one photo
Upload a room and explore a cleaner, more coherent interior with updated furniture, materials, color and lighting.
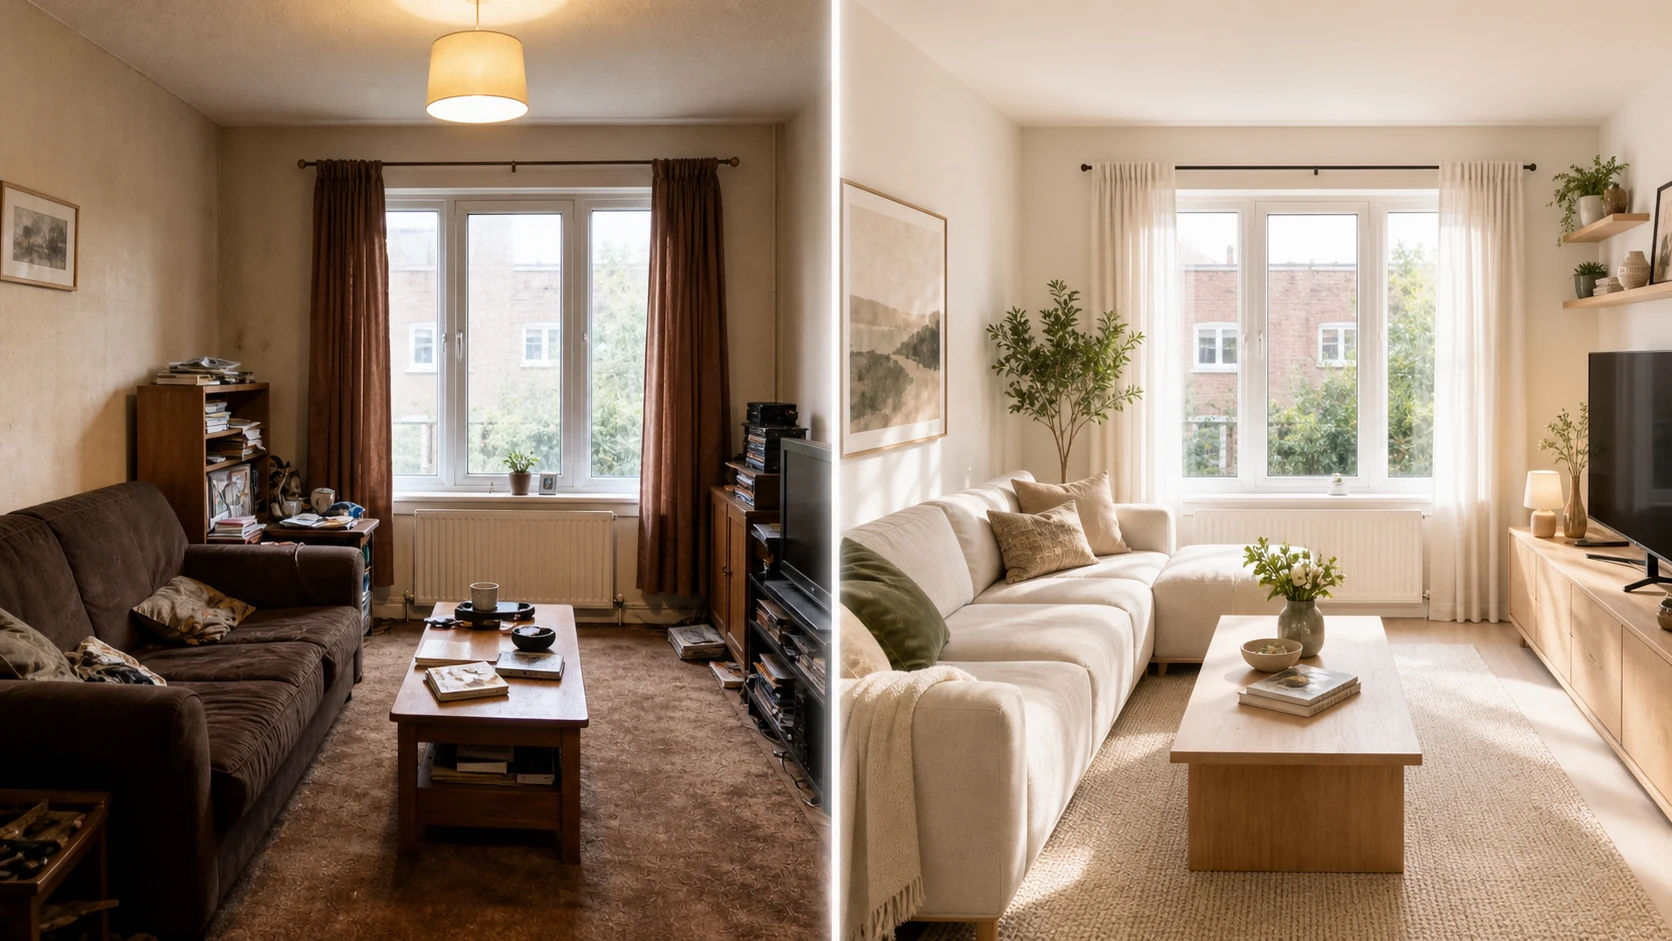
Example directions you can create
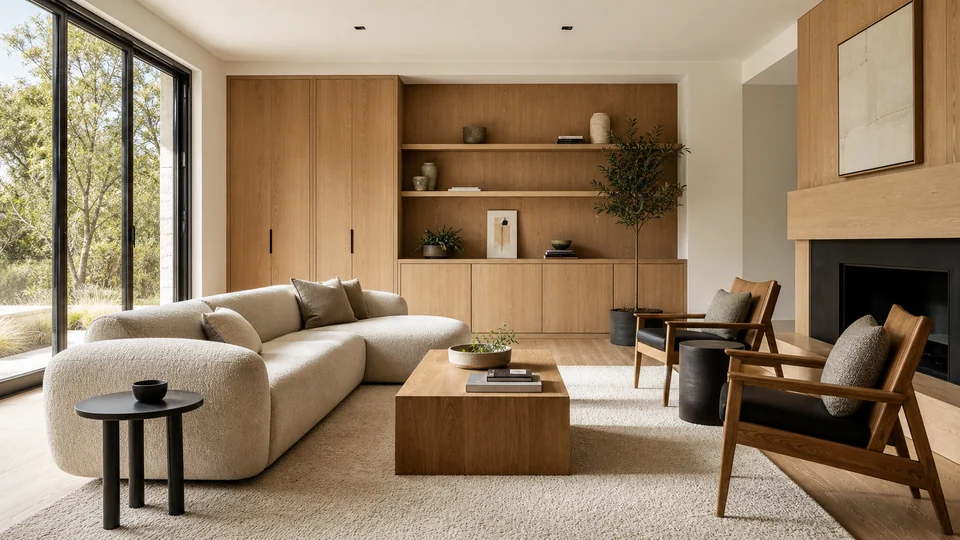
Warm modern — Natural wood, cream textiles and soft daylight. 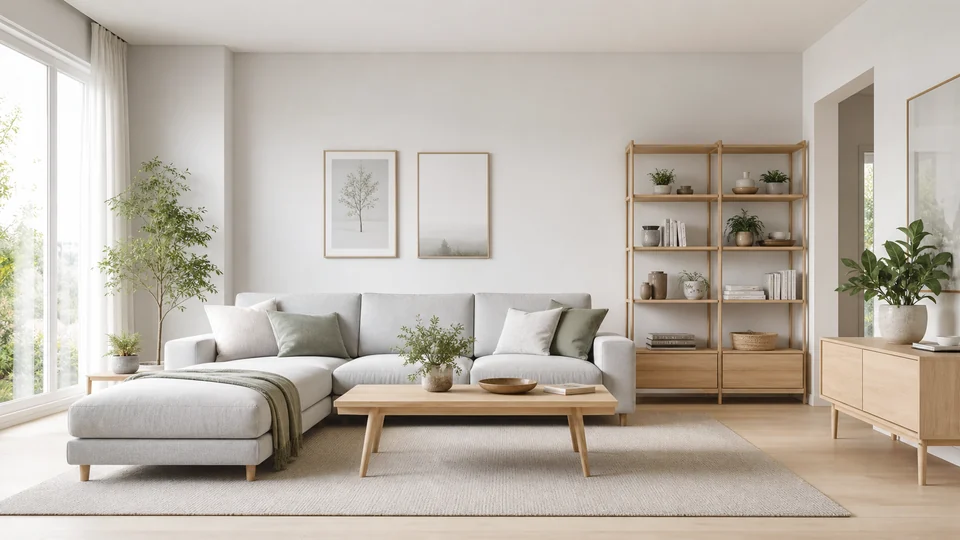
Scandinavian light — Airy pale materials and calm functional furniture. 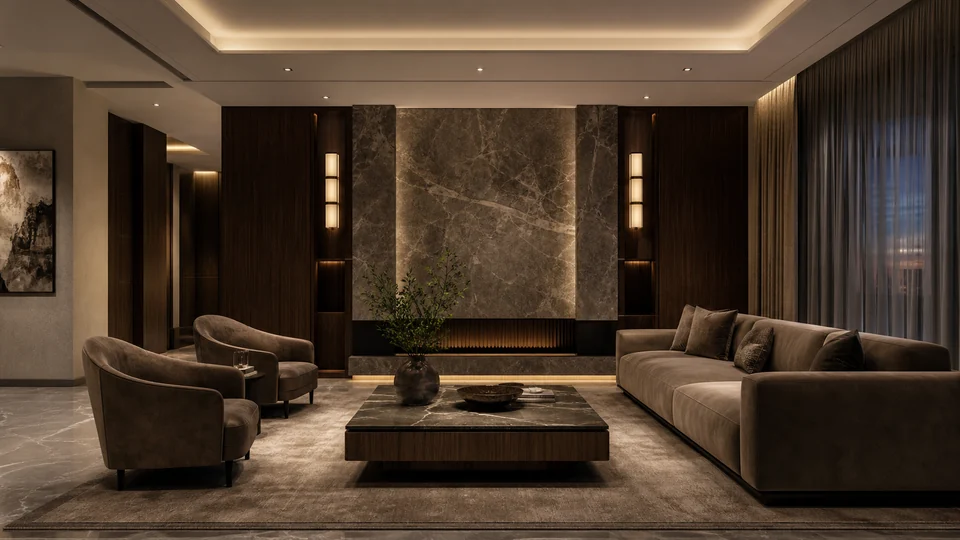
Boutique luxury — Layered lighting, stone accents and refined fabrics.
How Redesign any room from one photo works
A straight, well-lit room photo gives the model the clearest view of walls, windows, floor and existing proportions. State which structural details must remain fixed.
Studio opens with a room-redesign instruction and a horizontal format suited to interiors, ready for either photo editing or text-led concept generation.
What you can create
- Faster style exploration — Compare modern, warm minimal, Scandinavian or luxury directions before buying anything.
- Coherent materials — Coordinate furniture, flooring, textiles, color and light in one visual concept.
- Layout-aware concepts — Keep doors, windows and the room footprint recognizable while testing a new look.
Popular use cases
- Living-room makeover — Test a new palette, sofa, lighting and storage direction.
- Bedroom refresh — Explore calmer materials, textiles and ambient light.
- Virtual staging — Turn an empty or dated space into a clearer listing concept.
- Renovation moodboard — Create a visual starting point before requesting quotes or sourcing furniture.
A source photo that preserves room proportions
Shoot with the camera level and include the main wall boundaries. Name windows, doors, radiators and built-ins when they must survive the redesign.
- Show floor, ceiling and openings
- Avoid severe lens distortion
- Name every fixed architectural element
Why the result is not a construction drawing
The model can invent depth, move structural features or place furniture at an unrealistic scale. It does not know hidden services, exact dimensions or building rules.
Check whether the redesigned room could exist
Compare opening positions, ceiling height, floor perspective and walking routes. Inspect repeated furniture legs, broken reflections, floating objects and inconsistent shadows.
- Verify wall and opening positions
- Review furniture scale and circulation
- Flag impossible joins and lighting
How to get started
- Photograph the whole room straight on — Use a well-lit image that shows walls, floor, windows and doors without extreme wide-angle distortion.
- Lock the architecture and name the redesign — List openings and fixed elements that must remain, then specify one style, palette and furniture direction.
- Compare the concept with the real geometry — Check doors, windows, ceiling lines, circulation and furniture scale. Revise any impossible structural change.
Frequently asked questions
- Is an AI room redesign a technical interior plan?
- No. It is a visual concept. Measurements, construction details, safety and feasibility still need independent professional verification.
- Can PrimeArt keep windows and doors in place?
- You can ask to preserve them, but generative editing may still shift openings or proportions. Compare the result with the original room.
- Does the room need to be empty?
- No. An occupied room can be redesigned, although an unobstructed view makes fixed geometry and furniture boundaries easier to read.
- How does the prepared Redesign any room from one photo workflow continue in Studio?
- Use a well-lit image that shows walls, floor, windows and doors without extreme wide-angle distortion. PrimeArt carries this page's selected direction and format into Studio so you can begin with that specific setup instead of an empty prompt.
Open the prepared Redesign any room from one photo setup
Use a well-lit image that shows walls, floor, windows and doors without extreme wide-angle distortion. Continue to Studio with this page's specific direction and format already selected.